
Looking around there are many really good model tram engines
but some just stand out from the crowd. Such is the case for me with the
numerous models of the Clougher Valley railways original engines, the 0 4 2
Sharp Stuarts, captured so well by Paul Windle’s reduced
size version.It took me a while to discover where the original of this
engine came from, I eventually came across a picture of it on the Belfast Telegraph’s
archives, pointing me to the Clougher Valley railway as its home. I now have a
treasured copy of The Clougher Valley Railway by E.M.Patterson which is a
brilliant source of information about this tramway / railway.

Having just completed a course to learn 3D Cad I was advised to practice on a subject I would enjoy, so what better subject than this engine. I decided to work on a compact version to fit a Kato 11-104 chassis, and this was the first thing I drew up since I could use this chassis drawing on other projects as well.

Having just completed a course to learn 3D Cad I was advised to practice on a subject I would enjoy, so what better subject than this engine. I decided to work on a compact version to fit a Kato 11-104 chassis, and this was the first thing I drew up since I could use this chassis drawing on other projects as well.
 |
Cad file of 0 4 2 Sharp Stuart |
The whole process was an interesting challenge as I was planning to use 3D printing to produce the model, a process which meant a lot of reading to find out about the different material available.
My final choice of plastic was an acrylic which would
provide me with fine detail; I had selected two suppliers to try, one being
Shapeways and the other CWrailways http://www.cwrailways.com . My first
attempt was sent to Shapeways, which was a single piece body and had quite a
few drawbacks. Access to get detail and crew into the cab was one, I should
have made the roof separate. The other was that areas of the body shell were too
thin, which showed up as the acrylic is very brittle and easily damaged. A
corner of the roof overhang broke off, so I added a further layer of thin
plastic card to the top surface. The funnel was elegant but far too thin, I
ended up cutting it off and adding a Gem
white metal one. Also the bottom edges of the tram skirts were thin and seemed
pretty fragile, so again I did a bit of reinforcing with plasticard.
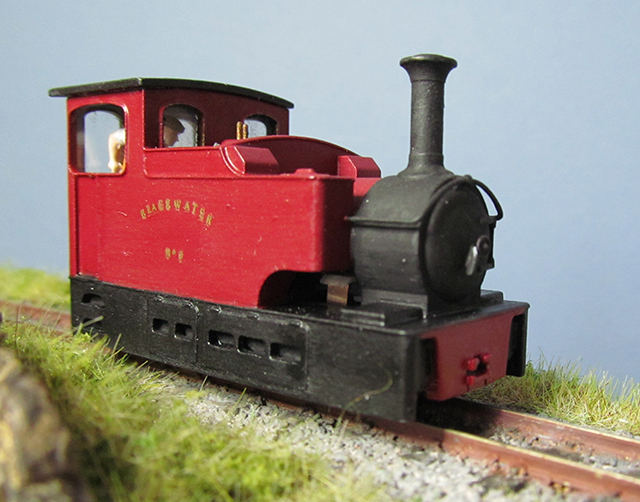
By the time I got round to ordering my second prototype I
had completed the first one. I finished it in Brunswick green and named the
engine Erne No 6 after one of the Clougher Valley railway originals.

With modifications done to the drawing of the second
prototype, I sent the STL file of to Chris at CWrailways who had kindly advised
on some changes to the model. When this second model had been printed it was more
robust and I was pleased with the results. There were a few little niggling
issues that prompted a return to the drawing board, but these were tweaks not
major things.
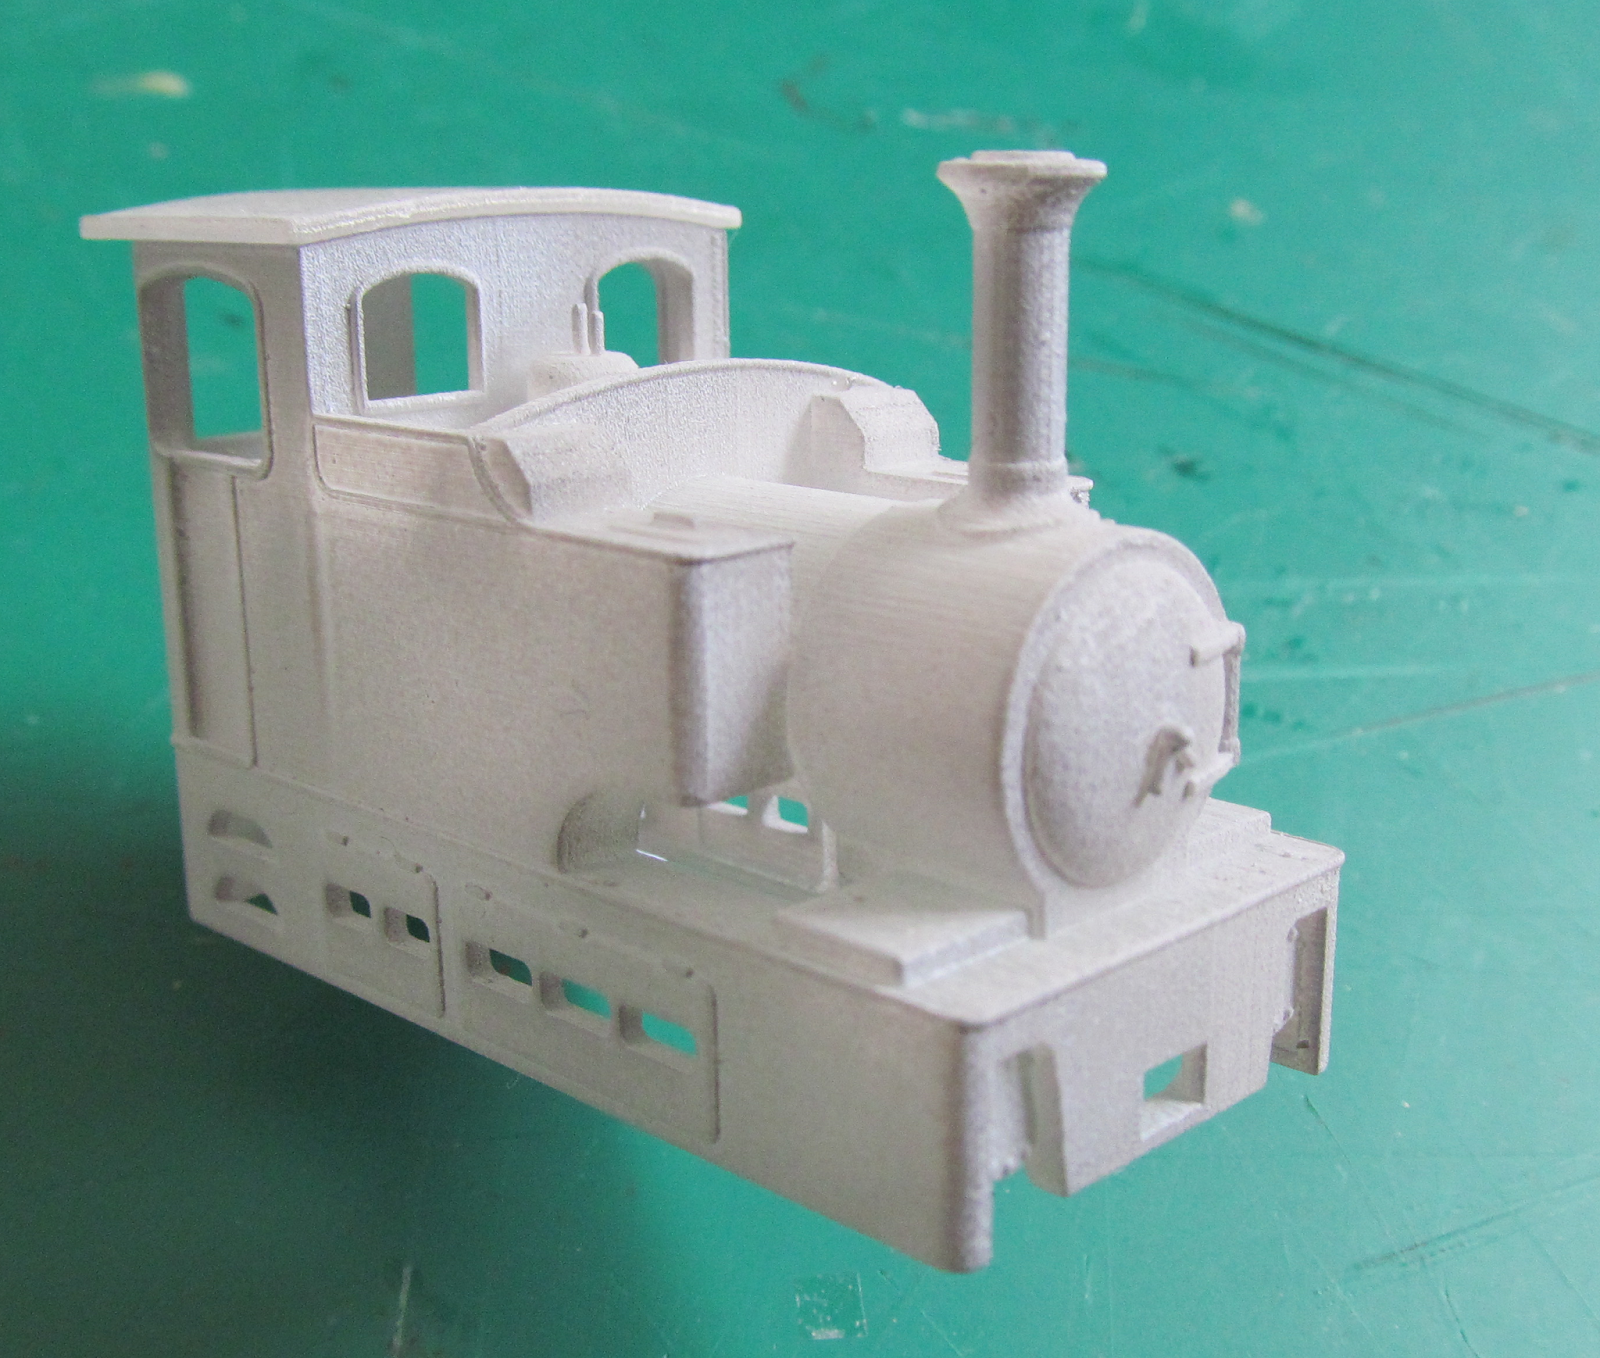
With the body shell form CWrailways there is no need to
remove the support wax residue. Unlike
the Shapeways version, you can rub over the surface with a wood lolly stick or
similar tool with rounded edges, and this helps to remove the layer effect
evident on the model’s surface. A good two or three thin coats of spray primer
will level the surface ready for the final brush or spray finish.
Once the first coat of primer was added to the body and any
blemishes to the surface corrected, I then added hand rails and other details.
The hand rails I used were from Mainly Trains http://www.mainlytrains.co.uk/ ; the make was Gibson, which uses 0.45mm brass wire and some really small brass
handrail knobs, one of the short versions of these
were used on this engine. They are fiddly to handle but look very much to
scale.

I made the head lamps
at this stage using 3 disks of 1 mm thick plasticard to form the body and two
small squares fitted top and bottom to give the lamp its distinctive shape.
These are the later acetylene lamps used on the C.V.R. The lenses were formed
by using a suitable sized drill bit and forming a concave shape hollow in the
face of the lamp, which was then lined with aluminium foil shiny side outward.
The lamp was then painted matt black and left to fit to the cab between the
windows after painting was completed.

It is necessary to cut down the Kato 11-104 chassis. The
cuts are made at both ends just at the outside of the fixing screws holding the
unit together, you will need to file a bit of the metal base back to this point
also. A couple of little bits of lead strip were added at each end of the
chassis just under the fixings.

The only other ballast I added to the second engine was two
pieces down the inside of each skirt. The first engine had the lead fitted to
the inside of each water tank and under the coal bunker. Both run well with the
weight added.
I cut some clear plasticard for the cab windows which was
much easier to fit with no roof on the cab and this was not glued in place
until the paintwork was completed. A suitable figure was selected from the
Dapol range of trackside workmen, adjusted to take up a relaxed stance in the
cab and painted. This was then put aside to be added with the glazing when
painting of the body was finished.
The final addition to the shell was Peco NEM coupler
pockets. These are glued together which is easier when they are whole. A small
strip of 0.5 mm plasticard was used to locate the pockets in the correct
position so they did not stick out too much on the face of the body, (but this
is personal choice). They were then cut down from the Z shape to form an L
shape, this being necessary because of the limited space I have allowed for the
chassis.

As mentioned earlier I added three thin coats of primer to
this model, the finishing coats were applied by spray and brush. Starting with
the red on the cowcatcher and the area around the front coupling, I have a red
spray paint purchased from Aldi which gives a good bright red finish. The body
and foot plate requires masking off well when using this, and I also use
masking fluid in the areas around the cylinders and coupler pockets.

Once a couple of coats of this was applied I moved on to the
main bodywork, for which I used Revell SM331 which is similar to Crimson Lake.
The black areas round the skirts, smoke box and cab roof were finished with Hunbrol Matt
black 33.
The finishing touches round the windows and safety valves
are in Hunbrol metallic bronze. It is usually a good bet to leave the model for
a few days after painting the top coats, as particularly on the Shapeways body shells
there always seems to be a slight reaction to the carrier wax residue, and the
paint stays soft. When I am quite happy that the paint has cured I add the cab
glazing and crew, then fix the roof in place.
The engine name and number are added next using Model master
water slide transfers. An ark cut from masking tape is used as guide to get the
individual letters of the name to form a curve.

When these have dried overnight I apply a coat of matt
varnish, usually Humbrol enamel brushed or acrylic spray.

The final touch is to add the coal. This is done using PVA
wood glue and crushed real coal. The coal bunker is filled with the PVA and the
coal pieces added using a small piece of tube sliced back at an angle to form a
scoop. This gives me a bit of control where the coal is going.

This model has opened up all sorts for possibilities for me,
Ideas are there and I am hoping to draw up a few more and print them.
If you would like to obtain a copy of the 3D print it is available at.
https://www.shapeways.com/product/TYBBEH7A6/009-irish-tram-engine?li=shop-results&optionId=57962544&rc=SearchResults
http://www.cwrailways.com/009-ng.html

I have had a prototype printed in FUD, and would be confident
that it should print in SWF as well, as its smaller twin dose.

http://www.shapeways.com/product/KSK5TV4JJ/?key=f5755833c042d20fc32b50583926515c&optionId=60192392
http://www.cwrailways.com/009-ng.html
009 Tram engine 2
Having been ask to create a version of this little tram
engine to suit a Hallings 12 mm chassis for HOm12 gauge, I found that the new
larger engine also suited the Kato 11-103 chassis, and it is this version which
I have made here see pictures below.

http://www.shapeways.com/product/KSK5TV4JJ/?key=f5755833c042d20fc32b50583926515c&optionId=60192392
No comments:
Post a Comment